Here it is another post about my introdution to Blender.
This time i will show how we can insert different objects into the 3D set.
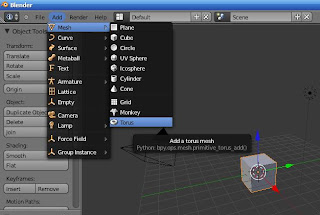
You already saw in another posts, i used more than the original Cube. Blender comes with several objects we can use from the start:
As you can see in the image above, throught the menu Add - Mesh, we gain access to more objects.
Now, if we just inset other objects, they all appear over each other in the 3D scene:
This is not good to see in a tridimensional scene.
An optimal scene must have objects with a good disctance over each other.
As you have see before, we can "grab" (G key) any object and move it in the 3D scene, but there is another option.
The 3D Cursor:
Any object we insert into the 3D scene appear in the place where this cursor is.
To place the cursor in another position just clic with the Left Mouse Button in another place.
Exercise:
Try inserting the different Blender objects in different places over the 3D set.
________
prof-2004


0 comments:
Post a Comment